Showing posts with label recipe. Show all posts

Tuesday, July 11, 2017

Recipe: Kombucha!

I began drinking kombucha as an effort to replace my occasional soda cravings. I never keep soda in the house, but felt free to drink it at restaurants. That way, I was drinking one per week at the most, excepting vacations. That said, in the summer, I sometimes crave the fizz. I had tried it several years ago and found it pleasant, but intense, so I would drink maybe a couple of ounces at a time. Fast forward to six months ago, when I restarted Weight Watchers, and wanted a go-to that was reasonably healthy but did not use fake sugar. Fake sugar always makes me feel off, and it was hard to find sodas that were fizzy but low in sugar. I began buying kombucha from the store, and drinking it more and more. Now, I am drinking about 5 bottles per week, give or take.

Anyone who has purchased kombucha regularly knows that the stuff is PRICEY! Between $3-5 per bottle on sale. I realized that there was absolutely no way I could keep on purchasing it at the rate I had been, and my roommate had asked me before if I had ever looked in to brewing it on my own. I had scoffed at the thought, assuming it would take tons of supplies, money, space, and involvement. That was when I happened to come across two YouTube videos describing kombucha, and how it is madeKendra explained it in such a simple, direct way and upon seeing it, I realized that it really wasn't difficult or overly time consuming at all, and the supplies are surprisingly basic.

To summarize for anyone who might not know, kombucha is a fizzy drink made from fermented sweetened tea. It is made by introducing a bacteria and yeast culture, known as a scoby, to the sweet tea and letting it ferment. The result is a slightly sweet, sour, fizzy concoction that is easily flavored with fruit, herbs, or juices.

To begin my adventure, I ordered a Kombucha Kit off of Amazon. It came with the vast majority of the supplies Kendra suggested, and I had the few other items at home that I needed.

         Displaying IMG_3845.JPG             Displaying IMG_3844.JPG

After that, I made the sweet tea mixture. I steeped the tea in four cups of filtered water. I used their tea and their teabag, but plan to use a metal strainer in the future. I do not think this fabric one is as reusable as they describe. I also have so much loose tea that I have an entire stash I use to cold steep for iced tea, and there are some I do not like iced. I plan to try to use them for kombucha in the future. Waste not, want not!
                                              Displaying IMG_3847.JPG

The oddest part of doing all of this is handling the scoby, the blob of bacteria and yeast responsible for creating the drink. I got one with my kit, though I know it reproduces and grows in such a way that like sourdough, you can easily pass the excess between friends. The one that came in my box was hockey puck sized, in about a cup of starter liquid.

                                                Displaying IMG_3849.JPG

I got my setup together, added the water and made sure the temperature wouldn't kill the scoby before putting it in, and covered it with the cloth. I love the temperature gauge taped to the side of the container because it is cheap, easy to see, and easy to monitor.

                                                Displaying IMG_3850.JPG
Over the course of this process I was convinced I had screwed things up somehow, it couldn't possibly be this easy. Setting up the brew took maybe 20-30 minutes tops. Again, it all just seemed too easy. So I checked my brew many times per day, waiting to see if the scoby would grow or if somehow it would all go wrong. I watched enough different YouTube videos on the process to know that the scoby should grow much bigger, have no mold, have some bubbles, forming near the top, and be whitish gray in color, maybe a bit tan, with strings all over the place. One day, I started seeing the scoby suddenly appear over the entire top of my container! It was very thin, but it was white, and looked healthy.

                                                  Displaying IMG_3877.JPG 

By the end, it was thicker, and clearly visible from the top. I started tasting it at seven days, decided to flavor it on the eighth day. It smelled and tasted somewhat sour and vinegary, as it should, but had some sweetness left. I dislike kombucha that is too sour, so I was worried to let it go very long on my first go.  I had decided already to invest in a second gallon sized glass jar, so I could get a new batch started more quickly while the other flavored. I got one with a spigot so I wouldn't need to handle the scoby each time. The scoby is firm, rubbery almost, and not fragile, but it is still an odd texture.

                                                  Displaying IMG_3913.JPG

After getting the new batch started, I took the remainder of the old batch and added a few tablespoons of lemon juice and about two cups of cut strawberries to make a strawberry lemon flavor. Recipes seem to call for one cup of fruit, but I was worried it wouldn't end up fruity enough.
      Displaying IMG_3915.JPG                   Displaying IMG_3916.JPG

Silly me! After letting it sit for maybe 15 hours, it was super sweet and strawberry flavored! Note for next time, crazy amounts of fruit not needed. I put the liquid in bottles using a funnel from home and a ladle, and they are carbonating on my counter as we speak!

                                                       Displaying IMG_3920.JPG

I let the air escape every 12 hours and pour a sip from one every day. This produced five 18oz bottles. I had left a fairly generous amount of starter liquid for the new brew, because I felt like it was better to be safe than sorry on that! So far we are on two days and it is not ready for the fridge yet, but it turned out very juicy and tasty!

I am excited for the final product, and have ordered a third glass jar to brew in, two gallons this time. Both my roomie and I drink enough kombucha that we could use a larger supply, and this will leave two jars available to make two separate flavors per batch, and hopefully 10-11 bottles per batch. I am sure we could accommodate more, but I have no idea if I will continue to consume it at this rate in the fall. I ordered more glass jars to accommodate more brewing as well. All of these supplies are completely reusable.

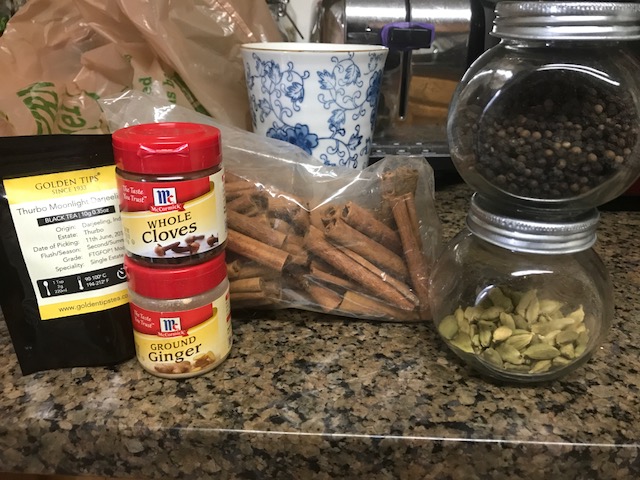
I am planning to let this next batch get a bit more sour. As you could see in my picture of the new batch, the puck of original scoby is still there, but a wider pancake is now also there. I can only assume that this means it will ferment faster. So, I will taste at seven days like I did the first brew, and taste every day after until it gets a little more sour. I am thinking of doing a fruit with mint combination for the flavoring. I used an oolong tea that is more mineral-y tasting than I prefer for hot or iced tea.

Thank you to everyone who actually made it here to the end of this very long, very involved post. I am excited about what kombucha will mean to help me make healthier, happier choices than soda! If you have ever made kombucha, please share any tips/tricks/comments you may have!

Saturday, July 8, 2017

Recipe: Butter Chicken

I am the absolute worst at controlling my spending when it comes to ordering Indian food. I love everything about it. Given that I am trying to not throw away all of my money, particularly over this summer, I jumped at the chance to try to make it on my own when I came across what seemed like a really manageable recipe!

Here is the recipe I used (mostly correctly, which is also a surprise when I make anything for the first time): The BEST Butter Chicken

So, the first step involves marinating chicken, and I marinated mine for 24 hours.


 I messed up and added ghee to the marinade because I misunderstood the written recipe, but it didn't hurt anything.

The next day, I just charred the edges of the chicken in a pan with ghee, removed it, and cooked down the tomato as directed.


I tend to have the hardest time being patient and I jump the gun in recipes and they don't turn out quite right but this time, I succeeded at resisting that urge! The tomatoes cooked for probably 25 minutes.


Such buttery goodness. Then, adding heavy cream told me what I always suspected but never REALLY understood: butter chicken is terrible for you. Next time, I would not add the full two cups though, I would try it with a cup and a half to make it a bit more tomato-y.


Once stirred together, the sauce becomes so silky and smooth! I added the chicken and let it simmer as the recipe instructs. It looked SO good and smelled absolutely amazing.


I couldn't find fenugreek leaves at any store around here, and ended up having to make a few changes. I used about a tsp of the ground seed, even though I know the taste is not quite the same, and instead of sugar I used plain maple syrup as the sweetener. At the end, the flavor was a hair flat, so I added another tablespoon of maple syrup and it turned out delicious. That being said, I plan to order fenugreek leaves so I can do this recipe properly soon!

It tasted so completely amazing. Not exactly like my local restaurant (unsurprisingly), but it was definitely as delicious. The flavor was just a bit different. I highly recommend trying this recipe if you love Indian food. I am trying chicken tikka masala next!!

Wednesday, July 5, 2017

Homemade Chai Update!

I woke up today, saw clouds in the sky and rain in the forecast, and despite it being summer my brain screamed "CHAI!!!!!!!!" and I knew today would be a homemade chai day. I shared a recipe a long time ago, and I still use that, but have made a few alterations to brewing to help things go a bit more smoothly.

As a recap, my ingredients have not changed but I do not measure them anymore. I use a bit of ginger powder (this dissolves quickly in the liquid) because I do not have fresh ginger in the house most of the time, four cinnamon sticks, a teaspoon of cloves, a tablespoon of black peppercorns, and maybe ten pods of green cardamom. Before, I bring about three and a half cups of water to a boil, then turn off the head and steep all of these whole spices for about 20 minutes. Then, I would bring the water back up to a boil and toss in about four tablespoons of loose darjeeling black tea and let it steep for 5 or 6 minutes like I would a strong cup of tea. Then, I would strain the mixture, return the strained liquid to the pot, stir in honey, add about a cup of dairy (anything from fat free milk to half and half, depending on how rich I wanted it to be), and heat it up on low.

A major change in procedure was containing my steeping ingredients in a strainer. I used to just steep them all freely in the pot, then I added the tea loose, and then had to strain my final product into another container and then return it to the original pot so I could reheat it and add the dairy and sweetener. It was messy, it dirtied up another pot, and I am not graceful enough to not pour the hot liquid all over me during the process. 

Since then, I have acquired several teapots that come with their own strainers. I love these not just because I love the pots, but because I often take out the strainers and use them for other things, such as this. This way, I can steep the spices and quickly remove them, refill the strainer with tea while the liquid heats back up, then steep that in the same strainer. Once everything is steeped, I can remove that quickly too. Then I can just put in sweetener, honey is my usual choice, let it dissolve, and add dairy without the extra steps.

However, using the strainer meant that my favorite ingredient, cinnamon, wouldn't be totally submerged. I knew I could probably stick those in the water outside the strainer and get them out with a fork, they are bigger and easier to fish out, but in a flash of g̶e̶n̶i̶u̶s̶  basic logic, I realized that putting all of them in a plastic baggie and pounding them down would not only make them all smaller, but would open the spices and intensify the flavors! I used the base of a bottle of strained tomatoes as my mallet, but any firm jar will do, you don't need to hit any of it hard.


If you have a spare strainer, and a plastic baggie, take that extra step. It is SO much easier to clean and contain! 

Additional pro tip that normal people wouldn't need to be told: don't try to just dump your mixture from your pot to a mug, because you will spill everywhere. I have literally two years of experience attempting this. Just use a ladle. Easy peasy, no mess. Yes, it took me two years to have that flash of g̶e̶n̶i̶u̶s̶ basic logic as well. 

Better late than never, right?

Saturday, May 9, 2015

Taco Spice and Hot Weather

I feel like I am in a kind of calm before the storm phase right now. My life is basically just me applying to jobs like a fiend, wrangling and herding truly insane children subbing, wondering where I will be going and what I will be doing in three months. Probably herding more insane children in a different location, at this rate. Kids are terrible these days - I don't remember feeling unsafe as a second grader, but I would have been absolutely terrified if I were in class with some of these children. In the meantime, it has suddely gotten hot as Hades out. Bye Spring, it was nice knowing you for all of five minutes. So I have been going back to more lazy dishes that don't involve the oven, or much effort at all. I have been terrible about going on walks, or cleaning, or anything that involves moving from in front of my fan that doesn't pay me money.

This "recipe" is kind of a cop out, as I know how to make tacos. They are glorious. But I always find myself needing to go to the store for those spice packets. So I decided to give the recipe from Laura in the Kitchen a go. It took spices I already had, and while those spice packets say they only cost a dollar, this ends up being a fraction of that for several meals' worth.
This was a little over one serving when I made it according to the recipe. It worked out though because after using it, I made two more batches to add to it (which I assume will add up to close to 3 meals' worth) and keep sitting around to encourage even further laziness.
After adding the tomato sauce and water, the only drawback was that this takes a solid ten minutes or so of simmering when the packets seem to take less. Logic tells me if I added a bit less water, I could cut this by a couple minutes without sacrificing anything.
It thickened nicely, and I used the leftover meat for nachos the next day. I like my tacos and my nachos with cheese, sour cream, and taco sauce (or hot sauce). Sour cream on the bottom to act like glue to help hold the meat in place, reducing the wreckage from inevitable taco collapses after the first bite. No space for any stinkin veggies for me. Guac is good too.

Highly recommend.

Wednesday, May 6, 2015

Long time...Recipe: Light Fettuccini Alfredo

Blogging fail. Since my computer being broken I have been hyper focused on getting my applications re-rolling (as I am discovering there truly is a never ending list of places to apply, given the application takes an hour on average) and getting my computer back to where it was before in terms of preferences and bookmarks and such. Also, subbing is of course a never ending adventure where at the end of most days I shake my head and realize exactly why so few certified teachers without contract jobs are subbing. It is rough work, so far almost as rough as actual teaching, because the pros and cons are so different. I have been exhausted, and taking a day here and there for more stomach trouble which I turn into an application day.

But, I am making good progress and have relooked at DOZENS of recipes I went back to hunt for to restore my to-make list from before. Last night I made this slightly unconventional Light Fettuccini Alfredo recipe from Laura In the Kitchen. She is one of my favorite YouTubers for food, beauty, and to watch vlogs for, which is rare. Don't let the amateurish website with terribly placed ads fool you, she is very good and also has a Food Network show I have yet to see, and a cookbook coming out this fall that I have already pre-ordered. I always find it strange when established brands have websites that look cheap or thrown together, given how easy it can be to find someone to design a site that is attractive, professional, and functional. That being said, I care about her food, not the site, and things are pretty easy to find on there. I tend to only go to the site to search a specific recipe for measurements, I subscribe to her YouTube channel and watch those for my primary instructions. I like that her videos are so easy to follow, as it REALLY helps me to be able to see step by step what things are supposed to look like.

I found this recipe to be easy to follow, very tasty, and pretty darn similar to an alfredo, despite the fact that it isn't made with heavy cream. It also only took me fifteen minutes to make, which is downright miraculous. After a day of teaching, I need things that can be made in a jiffy. It wasn't as creamy when I reheated leftovers, as the pasta absorbed the sauce a lot, but it tasted the same.
Ground chicken was a bit of an odd texture, given that traditionally cut up chicken breast is used, but the flavor was the same, and it did bulk up the dish a lot more. I was concerned I had not added enough flour, but it all worked out in the end.
I have been trying to use up my chicken bouillon cubes, so I used that to make the chicken stock, so I didn't season the chicken with salt when I browned it, and it worked out great.
I was concerned it wouldn't thicken up enough, so I let mine simmer a few minutes longer. My concerns were unfounded, as I underestimated the thickness of the cream cheese. Still had the same great taste, was a bit less saucy because the thicker sauce stuck to the noodles tighter.
I actually used Trader Joe's Garlic Basil Linguine because silly me forgot to buy fettuccini when I went to the store to get cream cheese and parmesan. Good parmesan really does taste better.
Added in the parsley, and that was all it took.

Seriously, fifteen minutes or less to make. Plenty of leftovers, so I would consider making half batches to keep things more reasonable for just me and remaking more fresh the next day so I could keep it saucy, but it was tasty reheated as well.

I am a hair behind schedule with all the sickness and stuff with my goal of cooking 50 new dishes this year, but that's ok. I am not on a schedule. 11 down, 39 more to go, and hopefully two more this week.

Friday, April 10, 2015

Recipe: Spiced Rice

Stomach bug again today. I really don't know why it is that I have been sick more in the past 6 months with colds and allergies and stomach issues than I have my whole life combined. I am hoping (sort of) that it is just stress. But I've been more on top of cooking again, which is good. This recipe was inspired by a recipe I saw on Budget Bytes, for Yellow Jasmine Rice. Except I don't like cinnamon in savory dishes and I didn't have bay leaves and I decided to go bonkers with the other spices. It still tastes fantastic. I had learned the gloriousness of using broth to make rice to give it amazing flavor, I am not sure why I never thought to cook it in spices before.

First, I melted a couple tablespoons of butter.
Then, I added the spices. I added turmeric, cumin, paprika, garlic, a little curry powder, and black pepper. I let them toast up a little and the house smells AMAZING at this point.
Then, I added in the dry rice. I have never made rice this way, but cooking it in the oil dry toasts it up and definitely changes the flavor some. 
I added the water in after a few minutes, adding a bouillon cube as well to create a broth. I normally would use cans or something of higher quality except I have so damn many of those cubes. It still tastes great at the end, and needs no salting at any other point.
The finished product.

I think I might never make rice the regular old way again. This is good as a side dish, it would be amazing as a base for any Indian inspired dishes (or any sauce recipe that normally goes over rice), and it would be very easy to mix in veggies and meat to make it a more complete meal. The best part is that there are infinite ways to tweak this to suit any taste or any meal.

I know my rice game has totally changed.

Friday, February 13, 2015

Recipe: Lentil Soup with Sriracha

I have been doing a lot of cooking these days, and last week was just a rock star cooking week. I tend to only share the recipes that worked super well for me. With the job application process being slow and boring, I feel like I have fewer places for tangible personal development overall. That said, it has been an excellent time to cook a ton, and I have to say I am feeling pretty accomplished lately.

I have been wanting to try a few lentil soup recipes, as I really like lentils and they are inexpensive and nutritious. I also go ga-ga over sriracha. I have had good luck with soup in the past - they are pretty hard to mess up. Or at least pretty easy to fix if you do mess up.

I used this recipe, and didn't need to change a thing, which I appreciated. I made this one a real vampire-repellant...with ten cloves of garlic. It ended up being a great choice for me, though I would be cautious about doing so if I was at risk of being "close" with someone who also didn't eat some. I also used my new chopper, which has totally revolutionized the whole onion issue for me. I can only chop large pieces of a single medium onion before being so teary eyed that I can't safely use a sharp knife. Plus, for this recipe, I liked that I could make it almost pureed.


I am basically obsessed with curry, and I like that this recipe has those flavors in it without being overwhelming. It is flavorful, but definitely not reminiscent of an Indian dish.


I added the tomato and stock and then added the lentils and let it do its thing for an hour.


The finished product.


Then, a generous helping of sriracha. I can honestly say that the soup is flavorful enough without it, for anyone who isn't into heat, but I love the flavor and heat so I go to town.


I personally prefer a chunkier soup overall so I didn't blend this, though I liked that there weren't big chunks of onion or garlic and those flavors were more diffused throughout the soup. It wasn't very liquid at all this way, so if that is something you prefer, don't use as many lentils. Probably even half would make it a more traditional soup consistency.

Thursday, February 12, 2015

Recipe: Matcha Chocolate Chip Scones

With all of the new things I am making, a few are standing out as game changers. This is one of them. I don't typically bake all that well, but who knew scones were so easy? Plus, tea and chocolate and baked goods together? Yes, please. I foresee running out of matcha rather quickly now. I adapted this recipe a little bit, as I found the scone mixture to be too sticky on its own. I added a lot more flour in the end, close to another cup's worth. I've made this twice, and it came out really well both times. My first was a hair better, because I spent a bit more time mixing things more thoroughly (my biggest challenge when cooking or baking is impatience), but I'd say this is pretty reliable.


Clearly this is not helping the weight loss a whole lot. I've upped my minimum walking distance to three miles instead of a mile and a half in part because of this exact situation. Whatevs.